 Cardassian Makur Class
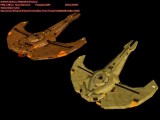
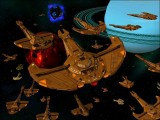
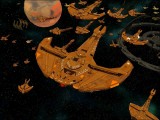
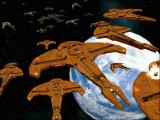
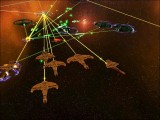
A new addition to the Spoonhead Fleet, and a great addition it is from Avon- The brand new and very shiney Makur Class. The Cardassian Fleet are probably one of my favourite fleets design-wise in Star Trek and the Makur Battlecruiser is a lofty addition to this highly militarized society's armada. Looking at the Makur it certainly ticks all the correct boxes to be a genuine Cardassian design. It has roughly the same frontal hull as the Janissary but is much larger in size and has some extra hull components on it's ventral side. It certainly fits the design lineage of the Sartan, Rasiliak, Vasad and Brinok that appear in Armada 2 so it gets a thumbs up for incorporating the generic Cardassian design.
Background/Concept
The Makur class Battlecruiser is an advanced heavy cruiser, built towards the end of the Dominion war to serve as a frontline command ship. It is slightly larger than the Galor class warship, with equally powerful weapon systems, and improved armour and sheilding.
The Makur Refit, was built with newly acquired armour technology from the Dominion, and features further upgraded shielding and plasma weaponry.
Overall it's not as imposing as the Hutet but it's still a cracking vessel that should be downloaded to bulk up the Union's Fleet... Now only if Kentar had this at his disposal.......![]()
- IKS
CREDIT UPDATE: Original mesh concept and design creator: RavenNight
*****************************************************************
MAKUR CLASS CARDASSIAN BATTLECRUISERS - FOR ARMADA 2
*****************************************************************
INSTALLATION --------------
First unzip the folder named "makur" to an easy to find location. I usually use my desktop.
Next, locate your Armada2 folder. Usually C:Program FilesActivisionStar Trek Armada II
---------------------------STEP ONE-----------------------------------------------
Inside the main armada2 directory, open the folder named SOD. From the "makur" folder you just unzipped,
copy the two sod files named makur and makur2. Paste these both into your SOD folder.
---------------------------STEP TWO-----------------------------------------------
Now back to the main Armada2 directory, and open the folder named odf. Then open the folder named ships.
From the "makur" folder again, copy the two odf files named makur and makur2, and paste them into your ships folder.
---------------------------STEP THREE---------------------------------------------------------------------
Now go back the main odf folder and open the folder named stations. Find the file named cyard2 and open it with wordpad.
Scroll down till you see //Construction Parameters
Add the following two lines to the list shown
buildItem4 = "makur"
buildItem5 = "makur2"
Save and exit the file
---------------------------STEP FOUR------------------------------------------------
Now go back to the main odf folder and this time open the folder named other. Look for the file named ec_ncomb
and open it with wordpad or notepad.
Add these next two lines in the list shown
item6 = "makur"
item7 = "makur2"
save the file and exit.
This will make the new ships available in the map editor. (you will find them under cardassian non-combatant)
---------------------------STEP FIVE-------------------------------------------------
Now right back to the main armada2 directory, and open the folder named bitmaps. Then open the folder named AdmiralsLog.
Then open the folder named ShipImages.
From the "makur" folder again, select the two bitmap images named makur and makur2. Copy them and paste them into
your ShipImages folder.
Now back to the main armada2 directory, and open the folder named textures. Then open the folder named RGB.
From the "makur" folder, copy all the texture tga files (there should be 12 in total)
Paste them into your RGB folder.
---------------------------STEP SIX----------------------------------------------------
Back in the main armada2 directory, open the folder named sprites. Open the file named gui_global using wordpad or notepad.
Scroll down to the bottom of the federation build buttons until you find the line:
b_fspecial gbfspecial 0 0 64 64
Underneath this line add the following:
b_makur gbmakur 0 0 64 64
b_makur2 gbmakur2 0 0 64 64
Next scroll down to where it says:
## SPRITE DATA ##
# Ship Wireframes
Underneath this add the following:
@reference=256
@tmaterial=interface
makurw1 makwf 0 0 128 128
makur2w1 makwf 128 0 128 128
Save the changes and close the file
---------------------------STEP SEVEN--------------------------------------------------
Back to your main armada2 directory and open your techtree folder.
Open the file named fulltech with wordpad or notepad and add the following anywhere in this file
makur.odf 0
makur2.odf 0
Save the changes and repeat this with the file named tech1.
---------------------------------END----------------------------------------------------
*****************************************************************
CREDITS AND COPYRIGHT
Meshes: Built by Avon
Textures: Created by Zorg001 and WickedZombie45
Texture mapping: Avon
Odfs, buttons, and all other stuff: Avon
Ideas, guidance, and a general kick up the bum now and then: From Tycoon
These ships were built for people to enjoy. If you want to re-release my material in any form
that is ok, but you MUST give credit to me (Avon)
and especially the texture artists (Zorg001 and WickedZombie45) whose beautiful work, make my models look good ;)
---------------------------------------------------------------
This is a freeware mod and not to be used for commercial gain. You instal this mod at your own risk.
THIS MOD IS NOT MADE, DISTRIBUTED, OR SUPPORTED BY ACTIVISION.
Copyright notices:
Star Trek, Star Trek: Deep Space Nine, Star Trek: The Next Generation, Star Trek: Voyager
(and the various logo devices used in them) are copyright Paramount Pictures, as are the characters,
related images, and sound from those productions. TM & (C) ACTIVISION & PARAMOUNT PICTURES
*****************************************************************
| Version | 1.0 | Author | Avon | Website | |
| Downloads | 1,188 | Size | 3.02 MB | Created | 2008-02-18 |

Comments
Sorry again for the error, and the hassle of having to chase it up.
I'm sure everyone here appreciates your awesome designs, and I'm just lucky enough to have built a few of them lately
Thanks for your patience
Avon